Get Started
We'll show you how to install the 1Flow Android library using Gradle.
1. Install 1Flow
Install via Gradle
If gradle version is 6.5 or lower, include the below repository in your project's
build.gradle file:javaallprojects{ repositories{ google() jcenter() maven{url 'https://jitpack.io'} } }
If gradle version is higher than 6.5, add the below code in
settings.gradle.javadependencyResolutionManagement { repositoriesMode.set(RepositoriesMode.FAIL_ON_PROJECT_REPOS) repositories { google() mavenCentral() maven{url 'https://jitpack.io'} } }
Add dependency in your app's
build.gradle file:javacompileSdkVersion 33 .... defaultConfig { .... minSdkVersion 21 } dependencies { .... implementation "com.github.1Flow-Inc:1flow-android-sdk:2024.02.26" }
2. Initialize 1Flow
Call this method from
onCreate in Main Activity / Launcher Activity.javaprivate void configureOneFlow(){ OneFlow.configure(context, "your-project-api-key"); }
Note: you need to replace
your-project-api-key with your actual project API key. Click here and navigate to Settings → Project → API keys section. Copy your API key and paste it into the code snippet.After adding the above method, you need to add
import 'OneFlow' in any class where 1Flow is called.Customize font (optional)
If you’re using custom fonts in your app, you can configure 1Flow to use the same font as the rest of your app.
java/**
yourFontFilePath : if your file name is 'arial.ttf', then you should pass "fonts/arial.ttf", assuming 'arial.ttf' file is inside 'fonts' folder
*/
OneFlow.useFont("yourFontFilePath");
Usually, we keep custom fonts in 'assets/fonts' folder.
Setup Observer (optional)
You can setup observer to listen for OneFlow setup event.
javaOneFlow.getConfigCallback(new OFConfigCallback() {
    @Override
    public void oneFlowSetupDidFail() {

    }

    @Override
    public void oneFlowSetupDidFinish() {

    }
});
Disable logs (optional)
You can disable the logs printed by OneFlow in your console. Use
OneFlow.shouldPrintLog(false); to keep your console clean from OneFlow logs.3. Identify users
In every new session, call
OneFlow.logUser() to pass the user identifier, along with any other parameters you'd like to store with us (such as email, full name, etc.) to 1Flow. To identify a user:
javaHashMap<String, Object> userDetail= new HashMap<String, Object>();
userDetail.put("Name", "TestUser");
userDetail.put("Age", 54);
userDetail.put("Height", 5.10);

// Calling this method will bind user with 1Flow
OneFlow.logUser("userIdentifier",  userDetail);
The 'userDetail' HashMap is optional, so you can just pass in
null if no additional info to send.5. Track events
Events are central to 1Flow. An Event is a marker in the code to track a key moment in the user flow - like when the user just created an account, completed some action, made a purchase or rejected an offer. We recommend you track at least 4-5 events to better understand the user journey.
javaHashMap<String, Object> mapValues = new HashMap<String, Object>();
mapValues.put("testKey1", "testValue1");
mapValues.put("testKey2", "testValue2");
mapValues.put("testKey3", "testValue3");
OneFlow.recordEvents(event_name, mapValues);// event_name should be String
Here, 'mapValue' is optional. Pass
null if you don't want any additional parameters to send with the event. Parameters in Identify and Track calls support the following types: String, Int, Double, Float, URL, and Date.
If you are converting Date to String, We recommend using a timestamp or Date object. It will be more helpful to set up trigger rules for this parameter across all platforms on 1Flow Dashboard.
Unsupported data types will be ignored.
6. Announcement Inbox
To display the announcements inbox to the user, invoke the function
OneFlow.showInbox(). This action will render the announcements inbox at the top of the screen.Note: Until the Announcement inbox screen is presented, the system will bypass any surveys or in-app announcements associated with events triggered within that timeframe.
Launch your first survey
Now that you've successfully installed 1Flow into your app, it's time to create your first survey.
If you've already created a survey and published it, run the app and trigger the event. You should see the survey show up when the event is fired.
Common issues and fixes
Manifest merging issue
Duplicate class
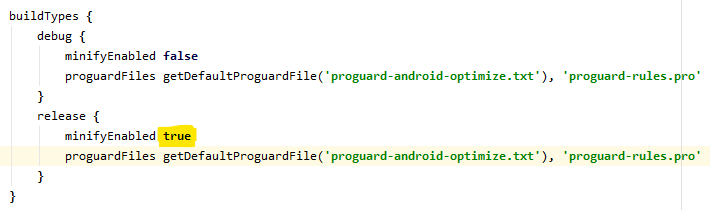
android.support.v4.app.INotificationSideChannel Pro-guard issue (things working in debug mode but not in release mode)