
Get Started
You can embed our Javascript SDK into any website or web application using Google Tag Manager. Users of Google Tag Manager can quickly setup 1Flow without making code updates.
Install Tag on a Website
To launch 1Flow surveys and messaging on your website with Google Tag Manager, please follow these steps:
- Navigate to the Google Tag Manager container which is installed on your website
- Click on “New” button to create a new tag
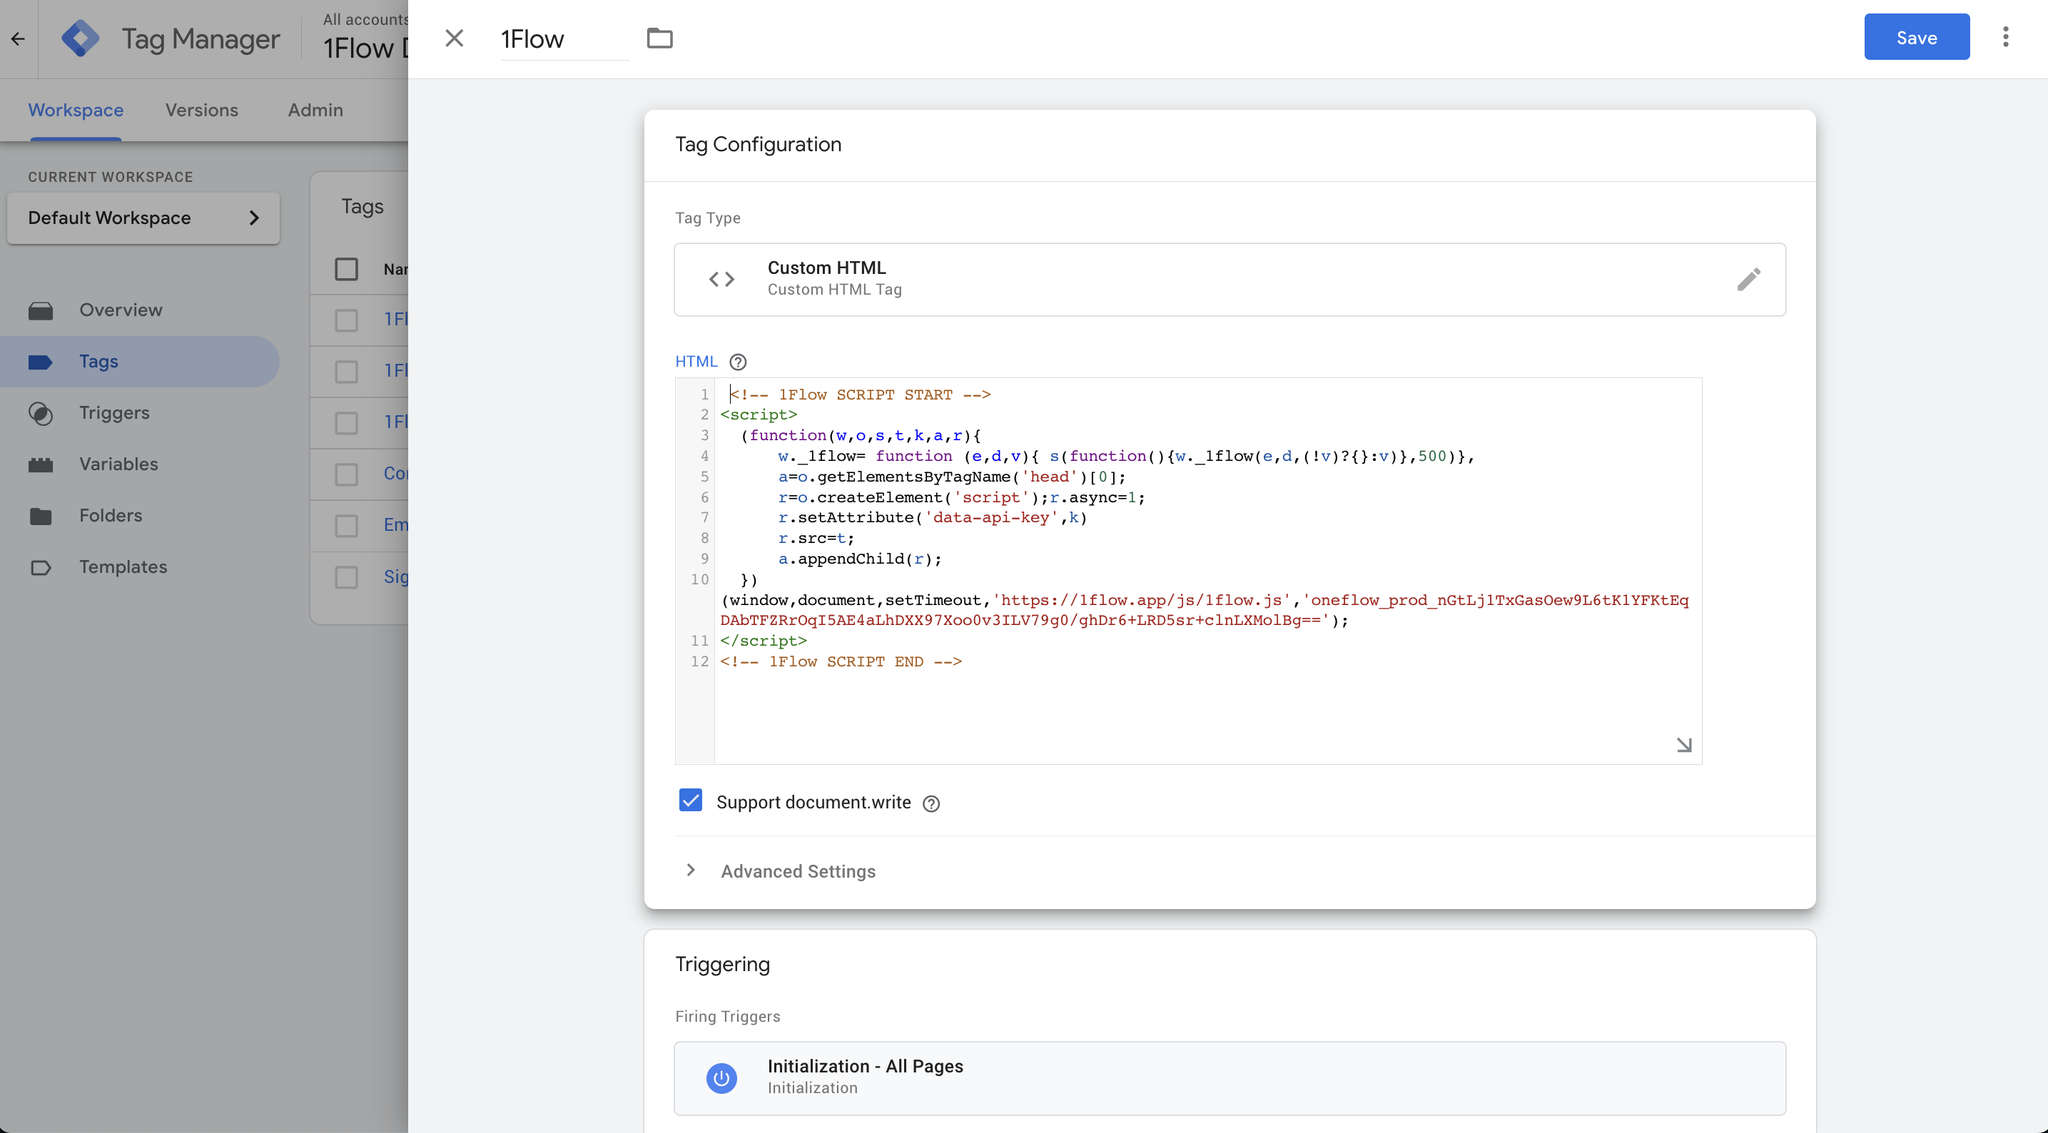
- Name your new tag “1Flow - Install”
- Click on Tag Configuration and choose Custom HTML
- Paste your 1Flow JavaScript snippet
- Fill in the snippet api key with your 1Flow project api key. You can find this in settings > project > api keys
- Check the box next to Support
document.write
- Set the trigger for the Refiner snippet to “Initialization - All Pages”
- Publish your changes to the workspace
html<!-- 1Flow Tracking Script -->
<script>
(function(w,o,s,t,k,a,r){
    w._1flow= function (e,d,v){ s(function(){w._1flow(e,d,(!v)?{}:v)},500)},
    a=o.getElementsByTagName('head')[0];
    r=o.createElement('script');r.async=1;
    r.setAttribute('data-api-key',k)
    r.src=t;
    a.appendChild(r);
})(window,document,setTimeout,'https://1flow.app/js/1flow.js', 'YOUR API KEY HERE');
</script>
<!-- End of 1Flow Tracking Script -->
Congratulations! You have successfully set up 1Flow in Anonymous Mode, ready to launch website surveys for anonymous traffic.
Install Tag on a Web App
If you want to launch surveys and messaging for logged-in users, you also need to identify the user by passing their user IDs along with other user traits to 1Flow.
Identifying users unlocks many features of 1Flow, such as user cohorts, customer 365 profiles, and more data integrations.
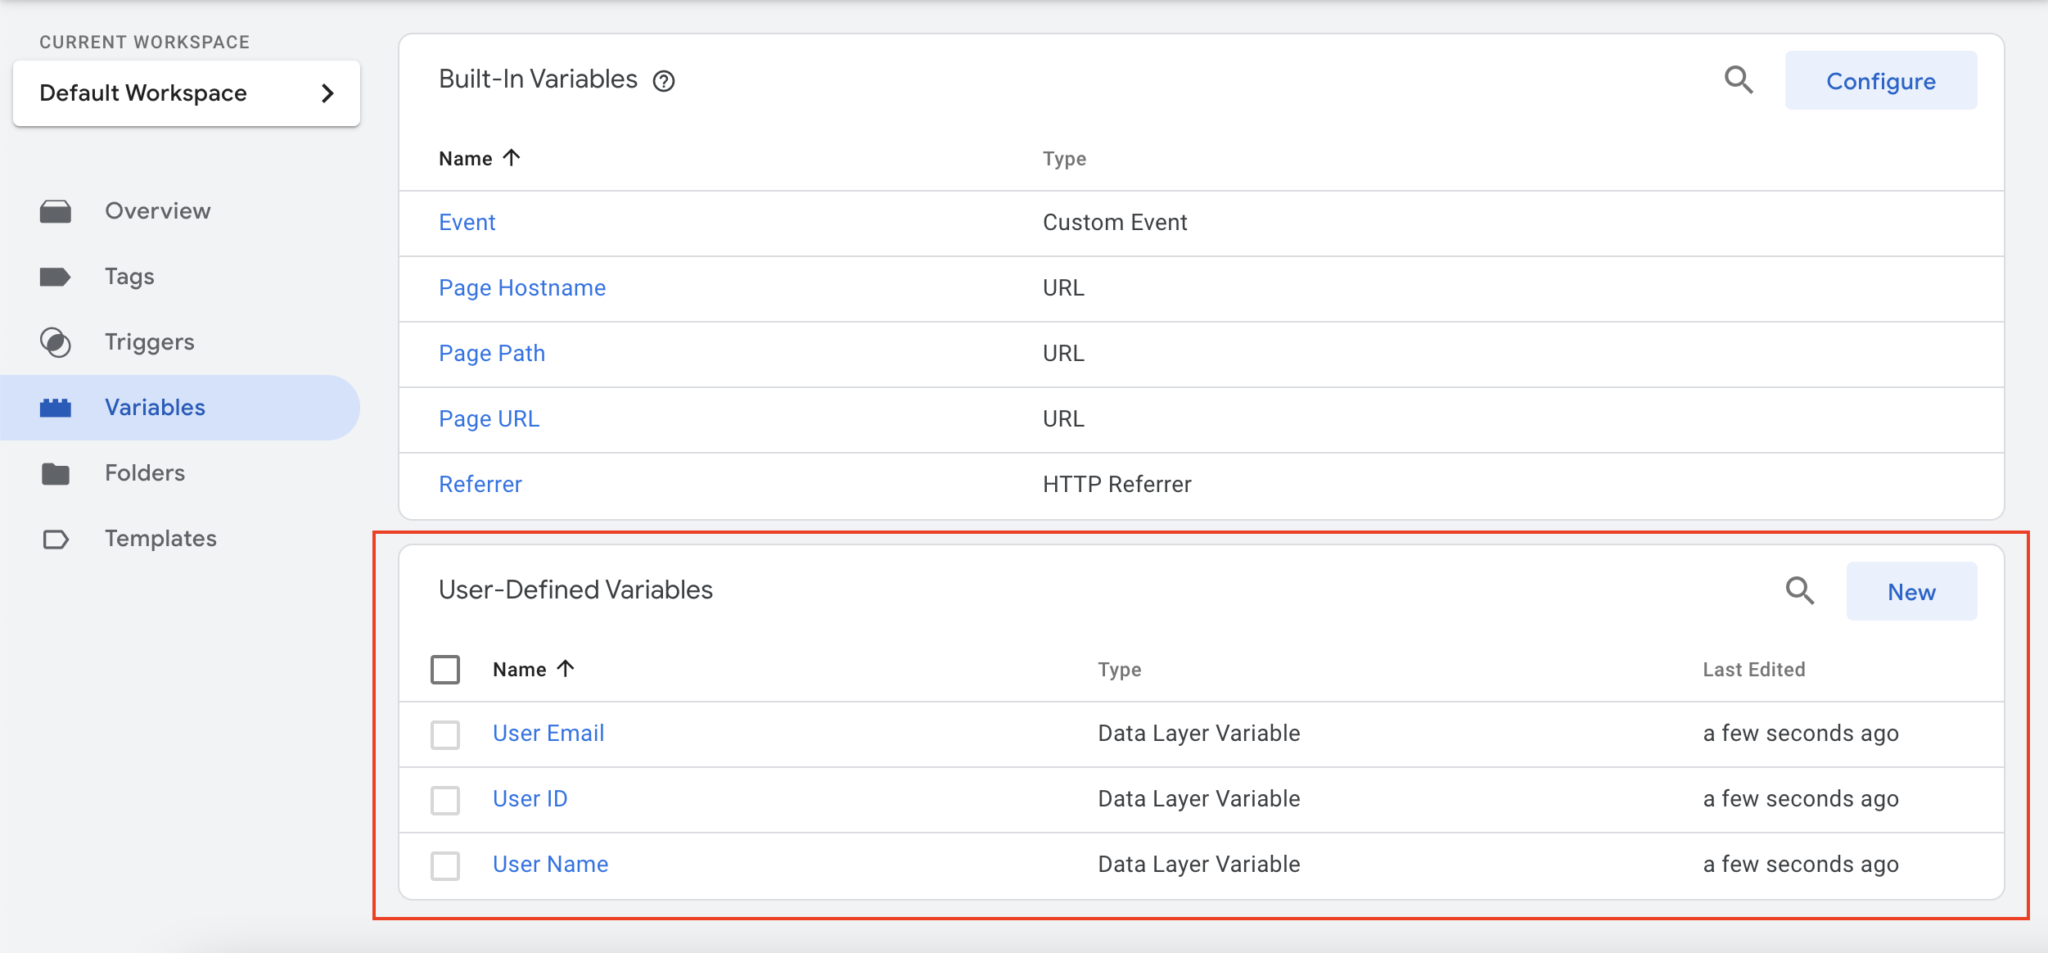
Create variables for your user data
First, make sure all user data fields you want to send to 1Flow are available as variables in Google Tag Manager.
Go to Variables in your GTM account and add “User-Defined Variables” based on your needs.
At a minimum, you want to have a variable
userId for the User ID used to identify users. Other useful fields might include:- phone
- plan
- company
- revenue
This list is just an example and you are not required to have these fields configured.
Identify users and updating user traits
Once user data is defined with variables, you can identify users passing in these traits.
- Create a new tag and name it “1Flow - Identify”
- Click on Tag Configuration and choose Custom HTML
- Paste your 1Flow JavaScript snippet for identifying users
- Fill in the userId with the variable representing user ID (in GTM, you can refer to variables by wrapping variable names in
{{VARIABLE}}- start typing{{into the script field, and you should see autocomplete menu showing up)
- Optional - Fill in the user traits you would like to pass in along with each user, by referring to the variables created before
- For triggering, select “All Pages - Page View”
- Publish your changes to the workspace
html<script>
  window._1flow('identify', {{userId}}, {
			"email": {{Email}},
			"company": {{Company}}
	}) // user traits are optional
</script>

Track Custom Events
1Flow’s automatic page rule targeting is great, but sometimes you may want to track custom events and use them to build your audience rules, or use specific events as triggers to a survey.
You can track 1Flow events using Google Tag Manager by following these steps:
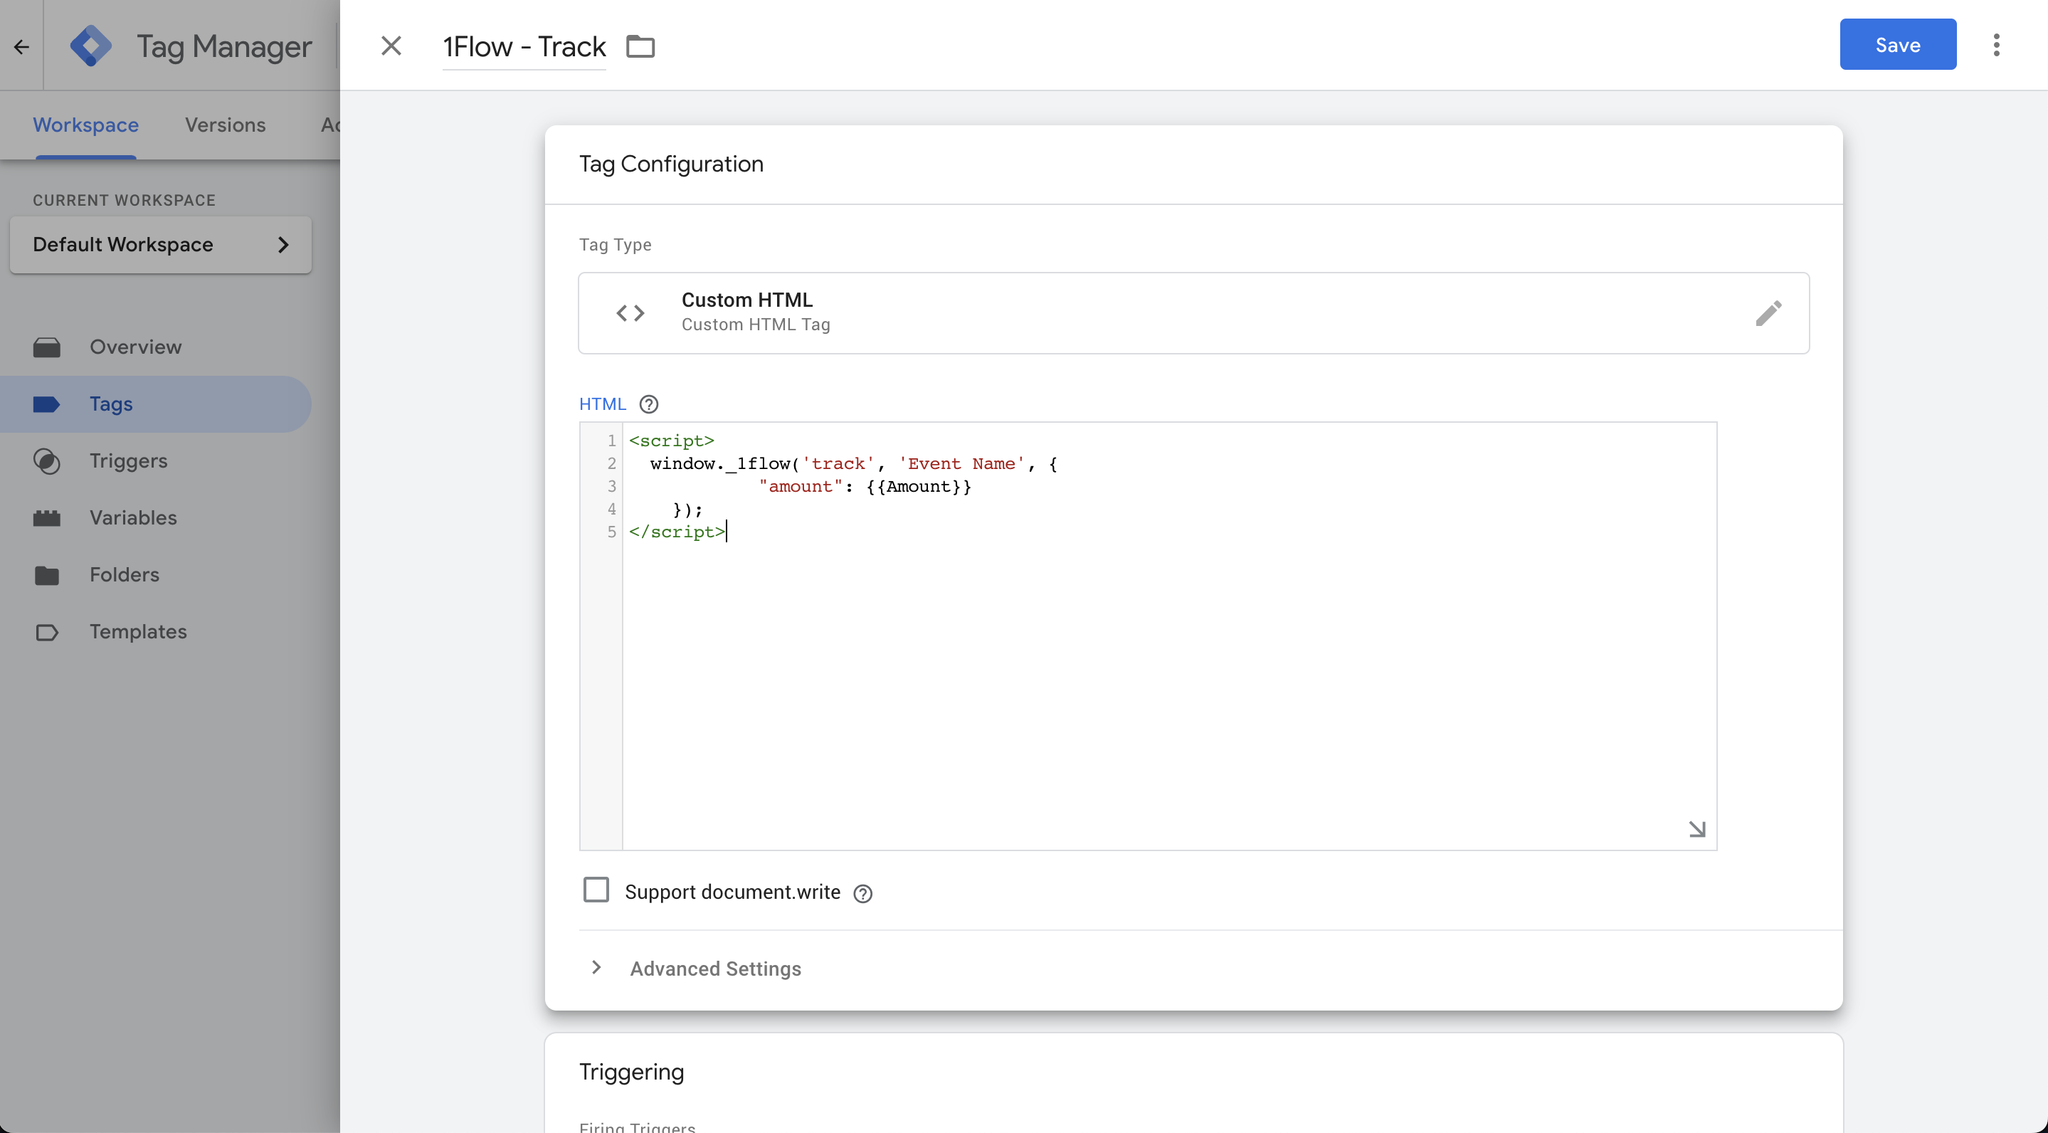
- Create a new tag and name it “1Flow - Track”
- Click on Tag Configuration and choose Custom HTML
- Paste your 1Flow JavaScript snippet for tracking events
- Name your event, and optionally pass in variables as event properties by referencing GTM variables
{{VARIABLE}}(for example,"plan": {{Plan Name}}if you have already set up a GTM variable named “Plan Name” and want to pass in this value to the event)
- Configure the triggering condition according to when this event should be triggered
- Publish your changes to the workspace
html<script>
  window._1flow('track', 'Event Name', {
			"amount": {{Amount}}
	});
</script>
Conclusion
Now that you've successfully installed 1Flow into your app, it's time to create your first survey.
If you've already created a survey and published it, run the app and trigger the event. You should see the survey show up when the event is fired.